Showing posts with label Simple Gifts. Show all posts

Saturday, December 17, 2011

Simple Gifts #4

Holiday Greetings!  Busy bee as usual around here, rushing now since its only a week til the big day!  Today's simple gift was made for my mom, who has a December birthday and loves candles of all sorts!


This project was lovely to make, smelled divine and was pretty easy!  And, if you keep your eyes pealed for deals it can be made very inexpensively.  Wanna make one too?  Here's what you need:


-any size or shape candle holder (i used a square one found at the Dollar Tree)
-decorative cinnamon sticks (found on sale at Michael's for $1.99)
-E6000 and/or hot glue
-Jute Twine (another lovely dollar store find!)

for the flower (optional)


-one inch circle punch
-old book page, scrapbook paper, sheet music, etc.
-one inch flat back marble
-one inch wooden circle or button

Step One:  Cut your cinnamon sticks to size.  I cut mine just slightly taller than the top of the candle holder.  I wanted them to not be uniformly cut to look more rustic, so I didn't measure much.  I used a pair of old wire cutters to snip them because I don't have a small saw.  This worked fine but you may want to wear safety glasses, sometimes shards of cinnamon sticks will fly!  This step is lovely because you get to smell yummy cinnamon the whole time!

Step Two:  Once you have your sticks cuts, start arranging them around the candle holder, gluing in place as you go.  For this step, I used E6000 because I thought it would be too messy with hot glue.  Do just a few sticks at a time, arranging as you like.  Hold in place with a rubber band and allow to dry ( I left mine overnight even though it probably only needed an hour or so to set!)  If you are using hot glue to adhere the cinnamon sticks you can skip the dry time and on to the next step!


Step Three:  Wrap several times with the jute twine.  Just wing it here, I wrapped it a lot because I was working with a pretty large candle holder and wanted it to be nicely centered.  I put a bead of hot glue every couple of wraps to help secure it.  Once you're satisfied with the number of wraps, tie a secure knot in it and tuck it under and secure with a little bit of hot glue.


Now, ERL saw it at this point in the process and said, "That looks really cool, you should leave it like that".  I do love the way it looks, but felt it needed just a little bit more, so I punched some circles with my 1" punch and did a little arranging to make the flower.  While working with them, I realized that I had randomly ripped a page out of the old book that just happened to have the word Christmas on them!  That told me it was meant to be!


Step Four:  I didn't take any step by steps of the flower, since I wasn't really sure what i was doing at the time!  Punch some circles, distress (if ya like), glue together, then slightly curl the edges with a pencil or a bamboo skewer. You can make the flower as simple or as elaborate as you like.  If you want to accentuate a word on your book page, glue the circle with the word on to a one inch flat backed marble, allow to dry thoroughly before gluing it to your flower.

Step Five: Once you have your flower assembled and decorated (how about glitter???), glue a wooden disk or button to the back of it with E6000.  This will give your fragile paper flower a little more stability and help it hang on to the jute twine.  Once your glue is dry, take your whole flower and stick it right on the twine, again I recommend E6000 because its a major adhesive that is very hard to get off once its dried!

Voila!  Fancy looking, yummy smelling candle holder complete!

I am so happy about this project, it can be simplified or fancied up in so many ways!  Tie a ribbon, add some bells, or just leave it plain and rustic looking!


Hope this mini-tutorial brings you inspiration!  Please let me know if you have any questions or run into any problems with this project.

Thanks to new readers and wishing you happiness for the holiday season!

Tuesday, November 29, 2011

Simple Gifts #3

Super Easy Any Way You Like It Scarf!

Here we go with my very first tutorial/pattern, but really its much more of a guideline than anything.  I can't claim this pattern to be 100% mine, I'm sure there are plenty out there like it because it really only requires a few basic crochet stitches and is easily customized.


This scarf can be made with any weight or style of yarn, with any size hook you have lying around, and can be as wide and as long as you like.  For this one, I used Caron Dazzleaire which is categorized as a bulky yarn but I would call it worsted weight.  Its really lovely for a gift because it has a slight shimmer to it and is very soft.  But I have also made it using a chunky yarn as well as holding two strands of contrasting yarn together, which gave it a nice tweed look.


Scarf as shown is 3 1/2" wide by 66" long, not including fringe

Here's what you'll need:

-Any weight yarn, at least 100 yds if you're using ww but more for bulky yarns
-Any size crochet hook (I prefer larger than K to give it a holey look)
-Yarn needle for weaving in ends
-Measuring tape (or not, I personally avoid measuring as often as possible!)

What to do:

Beg- Chain an even number of stitches to your desired width.  (for example, I did ch 8 with a size N hook)

Row 1- Half double crochet (hdc) in 3rd ch from hook and in each ch across

Row 2- Chain 2, turn, hdc in each stitch across

Row 3-???- Repeat row 2 until scarf is desired length.

Fasten off, weave in ends.

So simple and so pretty!  Also very nice to just sit in front of the TV and work on, since there's no counting rows or stitches!


Don't know how to do fringe?  I didn't either but found some easy peasy instructions in my trusty Readers Digest Complete Guide to Needlework. (I know I've mentioned my love for this book before, but seriously if you come across it at a thrift or used book store, snatch it up!) I didn't take photos while working on the example because it was too dark, but I dug up a WIP to show you!

Fringe:

-Cut a piece of cardboard slightly longer than you would like your fringe to be, mine is 4 1/2" long

-Wrap yarn around the cardboard many times (I did this step twice due to not wanting to cut through a huge   chunk of yarn at once and laziness about doing the math for how many I would need!)


-Cut the yarn across the top so you end up with a nice pile of strands

-Seperate number of strands you want each tassel to be (ex. is three strands)

-Insert hook into stitch and wrap yarn around hook in the middle of the bunch


-Draw folded end of yarn bunch through the stitch


-Wrap hook around yarn bunch, pull through the loop and tighten knot.


-Make sure you are doing this on what you would like to be the wrong side of the scarf, the knot will look like this on the back:


-The right side of your fringe will look like this:


Well, there ya have it!  I hope you've enjoyed Spidermom's very first tutorial ;)  Please let me know if you have any questions and I'll be right there to help!  Now, go!  Make an easy, stress free gift for somebody special!

Tuesday, October 25, 2011

Simple Gifts #2

Today's simple gift comes courtesy of a great new blog I've discovered, Crafting Rebellion.  This Purse Sized Notebook was so simple and inexpensive I couldn't wait to try it out! 


Crafting Rebellion has gifted us with a fantastic tutorial here.
Go there right away and try one out for yourself!  I have a feeling once you make one you will want to make many!  I've made two so far, one was made and gifted to a friend who was under the weather and not photographed, and here's a shot of my second attempt:


The beauty of this project is that you can make it as plain or as fancy as you like.  I didn't have a good coordinating color to ribbon wrap the ring, but i like the simplicity of it as is.

I always claim to not like the color orange, but I seem to find myself going with orange and other fall-ish colors this time of year.  Who could blame me when you see the wonders of autumn in Denver all around?


Go out and crunch some leaves under your feet, enjoy a little bit of autumn!

Friday, October 21, 2011

Simple Gifts #1

I've mentioned the huge family and wanting to make everyone a little something this year for the holidays, so I thought I'll take you guys along with me by providing links, guidelines and mini tutorials of inexpensive, quick and simple projects.

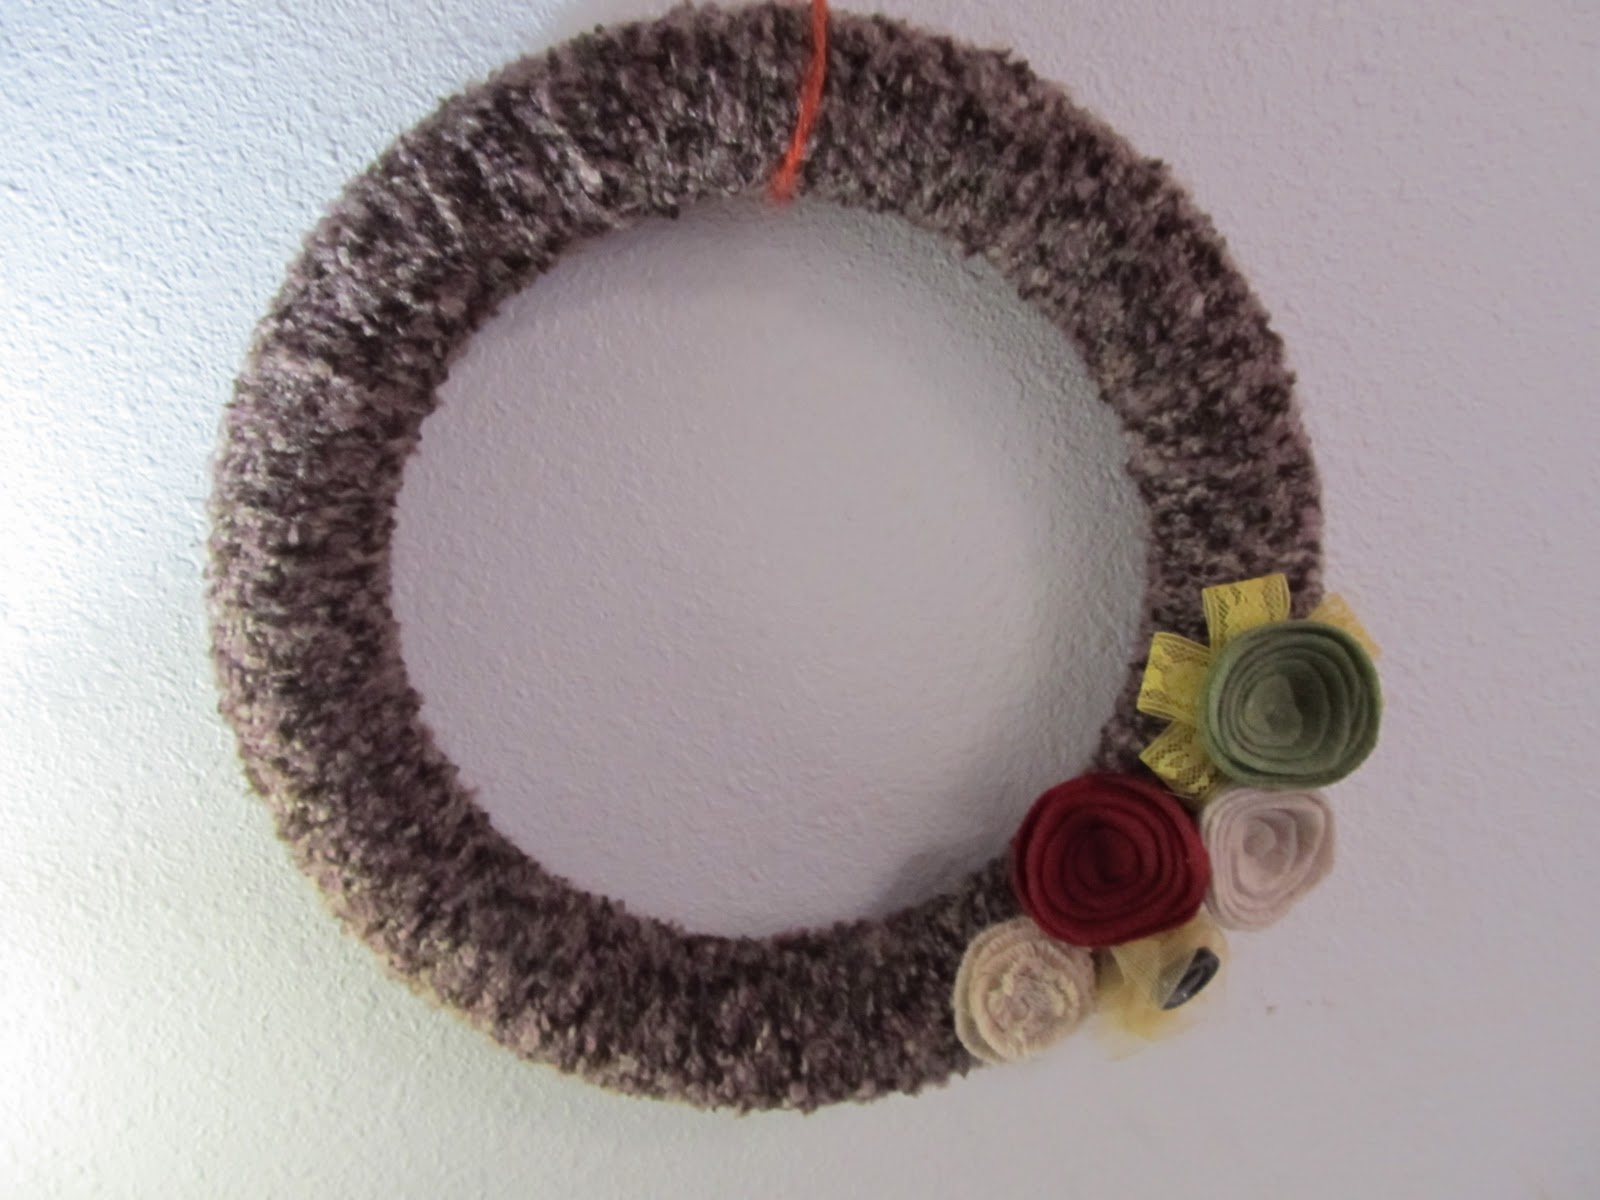
I spent a lot of time browsing around the craft blogs this week and came across this wonderful tutorial on Yarnista.  I was able to get out and about and made my way to the Not So Stinky Thrift and was lucky enough to find a styrofoam wreath, a steal at 99 cents.   Here's a quick in-progress shot:
I did a bit of searching for fabric flower patterns, but in the end settled on the felt flowers in the tutorial.  The finished result is so sweet on its own, I love the imperfection of them, as I hate to measure!   Here's one I did using pinking shears, the second shows one cutting the circle with a little bit of a scalloped edge.
 These flowers would be perfect for many projects, embellishing headbands, attached to a clip or pin for a sweet little barrette, or even grouped together for a nice brooch.
I was fussy about placement of the flowers and had a serious fear of over-embellishing, so I didn't use either of these on the finished wreath.  All in all the project would have only taken around an hour, had I not been interrupted several times to tend to Babygirl and other domestic duties! :)
I love the simplicity of it, so pretty and all in all cost maybe two dollars in materials.  I'm having a hard time deciding how to finish it (as usual) so I haven't done anything with the hanging part yet.  I'm thinking maybe some wide ribbon...suggestions?
Yarn Mountain De-Stash Value=  half a skein of soft boucle, which I have quite a bit of, so there will likely be more wreaths in my future to get rid of it!

Ok, I confess, I also bought yarn at the above mentioned thrift store, but really, how could I resist this lovely wool/mohair blend in my favorite colors???
More projects to come, Happy Friday!
Related Posts Plugin for WordPress, Blogger...